| The Loop Browser is a complex organizational tool that goes beyond buttons, columns, and podcast sounds. There are many hidden features you can use to customize the Loop Browser. Let's explore some of these features while we build the melody and rhythm tracks for this song using Apple Loops. Resizing and Rearranging Columns in the Results List A good place to start customizing your Loop Browser is in the results list. The results list has six different columns.  To view additional columns, you can click-drag the horizontal scroller below the results list. 1. | Press Cmd-L, or click the Loop Browser button, to open the Loop Browser.
| 2. | Drag the scroller toward the right to see the last columns in the results list, if you don't already see them.
These columns contain information about the individual loops and can be used to sort the loops within the results list.
All the columns can be moved or resized except for the Loop Type column, which always stays on the far left.
To move a column, drag the column header.
| 3. | Locate the favorites column, which is labeled "Fav."
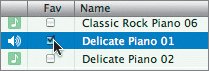
| | | 4. | Drag the Fav column header toward the left and release it before the Name column.
 The Fav column does not need to be very wide because it isn't used for text.
Extending the Name column makes it easier to read the names of the loops in the results list. You can resize a column by dragging the right edge of its column header.
| 5. | Move your pointer to the right edge of the Name column header until it becomes a resize pointer.
 | 6. | Drag the right edge of the Name column to extend the column to the edge of the results list.
 Note Changes that you make to the columns in the Loop Browser are saved with the project, rather than the application. New songs that you create will have the same customized browser settings, but older songs that were saved prior to the changes will maintain their original settings. |
Selecting Favorite Loops With over 1,000 loops to choose from, sometimes it's a good idea to mark your favorites or the loops you plan to use for a specific song. That way, when you are ready to start building the song, you won't have to break your creative flow to go hunting for loops. Instead, they will all be located in one categoryfavorites. Any loop that is marked as a favorite can be located easily with the Favorites button in Button view or in the Favorites column in Column view. 1. | Click the Reset button to reset (deselect) any buttons in the Loop Browser.
The song is based around a piano melody, so let's start with the piano.
| 2. | Click the Piano keyword button to select the piano loops.
| 3. | Scroll down through the list of piano loops and select Delicate Piano 01 to preview the loop.
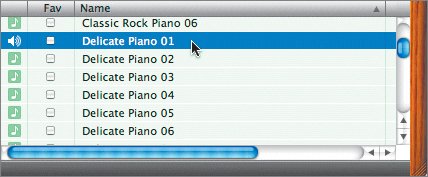 This loop is perfect for the song. All you have to do now is mark it as a favorite so you can look for another piano loop that might go well with this melody.
| 4. | Click the box in the Fav column next to the Delicate Piano 01 loop.
 The Favorites button is no longer dimmed, indicating that you now have at least one loop marked as a favorite.
 | | | 5. | Select the Classic Rock Piano 06 loop to preview it. It should be above the Delicate Piano 01 loop in the list.
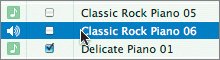 This melody works well with the delicate piano loop.
| 6. | Mark the Classic Rock Piano 06 loop as a favorite.
| 7. | Click the Piano button to deselect the button and empty the search results list.
| 8. | Click the Favorites button to view the loops you marked as favorites in the list.
 | 9. | Click the Column View button to change the Loop Browser to Column view.
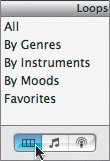 Notice the Favorites option in the Loops column.
| | | 10. | In the Loops column, click Favorites, then in the Favorites column click Piano.
Notice that the Piano descriptors have one or two selections. These descriptors apply to the loops you selected as favorites, and include all the categories you could use to search for them in the Loop Browser. Later in this lesson, you'll see that there are keyword buttons for each of these descriptors that you can use with the Loop Browser in Button view.
| 11. | In the Piano column, click the Acoustic descriptor to see both favorite loops.
 | 12. | Click the Button View button again to return to the Button view.
|
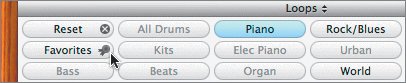
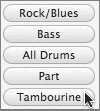
Now that you have searched for a loop, marked it as a favorite, and found it in the Loop Browser using Button view and Column view, it's time to find and mark more loops for the song. Moving Keyword Buttons Keyword buttons are not only easy to use, but also easy to move. To move a button, all you have to do is drag the button to a different button location. The button you move will swap places with the button in the current location. The only buttons that cannot be moved are Reset and Favorites. Why would you want to move a button? Good question. Since you know that you want certain instruments for the song, group all of the instrument buttons together near a common descriptor so you can spend less time searching for buttons and more time searching for loops. For this song, you'll need piano parts (which you've already marked as favorites), a bass, and some drums and percussion, so let's group them all together with the common descriptor Rock/Blues. Let's start by moving the Rock/Blues button closer to the results list for easier access. 1. | Locate the Rock/Blues button in the Loop Browser.
 | 2. | Drag the Rock/Blues button and move it on top of the Ensemble button, located at the top right of the keyword buttons.
The Ensemble button is highlighted when you move the other button over it to show that you are moving the new button to that location.
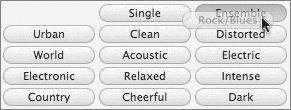 | 3. | Release the mouse to complete the button move.
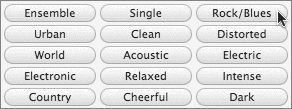 The Rock/Blues button is now in the upper-right corner, and the Ensemble button has moved to the old Rock/Blues position.
Let's move the other main instrument keyword buttons we need to the button positions below the Rock/Blues button.
| | | 4. | Locate the Bass button and move it to the position directly below the Rock/Blues button.
| 5. | Locate the All Drums button and move it to the position below the Bass button.
 |
Now that the buttons are in place, let's hunt for some more loops to use for the song. 1. | Click the Rock/Blues button to select it (if it is not already selected).
| 2. | Click the Bass button to narrow the search to Bass loops that are also classified as Rock/Blues loops.
| 3. | Drag the scroller to scroll down through the results list until you locate Muted Rock Bass 01.
| 4. | Click the Muted Rock Bass 01 loop to preview it in the results list.
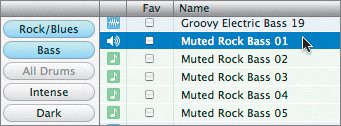 | 5. | Click again to stop the preview. Then mark Muted Rock Bass 01 as a favorite.
| 6. | Click the Bass keyword button to deselect it.
The Rock/Blues button remains selected.
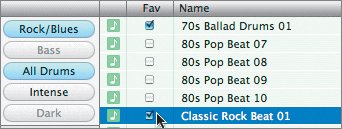
| | | 7. | Click the All Drums button to search for Rock/Blues Drums loops.
| 8. | Locate 70s Ballad Drums 01 in the results list and mark it as a favorite.
Tip When selecting loops for drums, percussion, or melody tracks, select more than one choice for the song. That way you can keep the project from sounding too repetitive, and you can build variation within the tracks. | 9. | Locate Classic Rock Beat 01 in the results list and mark it as a favorite.
 | 10. | Click the All Drums button again to deselect it.
| 11. | Click the Favorites button to view your current favorites.
You now have five loops in your favorites list.
| 12. | Click the Favorites button again to deselect it. Then click the Reset button to deselect all buttons.
|
Showing More Keyword Buttons By default, the Loop Browser shows 35 buttons (including the Reset and Favorites buttons). You can easily increase the size of the Loop Browser to show up to 66 buttons. Why would you want to see that many buttons? If you're just starting a song, you might not know exactly what type of loop you want. Some of the Genre or Mood buttons, like Cinematic, Experimental, Grooving, or Melodic, that are normally hidden from view might inspire you. If 35 buttons are a nice salad-bar-sized selection to choose from, 66 buttons are the full-blown keyword button buffet. To resize the Loop Browser, you drag upward on the divider between the Timeline and the Loop Browser. Let's resize the Loop Browser to see more buttons. 1. | Move your pointer over the empty gray space to the left of the Record button to change the pointer to a Hand tool.
 | 2. | Drag the Loop Browser up until all of the buttons are showing.
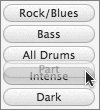
 Notice all of the new buttons from which to choose. The Part button will be perfect for the shaker and cymbal crash parts. Notice all of the new buttons from which to choose. The Part button will be perfect for the shaker and cymbal crash parts.
| | | 3. | Locate the Part button and swap it with the Intense button.
 Having all these buttons at your fingertips is great for browsing through loops and finding favorite loops to use later. Unfortunately, the expanded browser doesn't leave much room in the Timeline for arranging your song.
Now that you've seen the full button spread and have rearranged the buttons you need, it's time to resize the Loop Browser back to the more compact, Timeline-friendly default size.
| 4. | Drag the top of the Loop Browser down to resize it back to the normal size.
|
Changing a Keyword Button Now that you have resized the Loop Browser, you have seen some of the additional keyword button choices that are available for you to use. Instead of dragging buttons to a more convenient location, you can simply change a keyword button to a new keyword. 1. | Locate the Dark button.
| 2. | Ctrl-click the Dark button to open a shortcut menu of keyword choices.
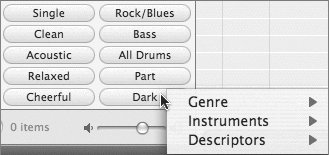 The shortcut menu has three submenus of keyword choices: Genre, Instruments, and Descriptors.
| | | 3. | Choose Instruments > Percussion > Tambourine from the shortcut menu.
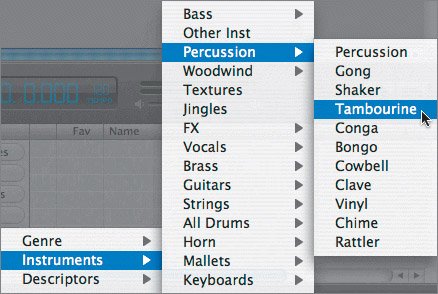 Note Your shortcut menu layout may differ from the picture depending on your screen resolution and the location of the shortcut menu on your screen. The Dark keyword changes to Tambourine in the Loop Browser.
 Tip You can also use this technique to customize the blank buttons that appear in the expanded Loop Browser view without losing any of the built-in buttons in the process. |
Now that you know how to customize your Loop Browser, let's find the rest of the loops for the song. Project Tasks It's your turn to find the remaining loops and mark them as favorites. Start with the tambourine parts, then the shakers, and finally the cymbal crash. Use the Keyword buttons and search text field as needed to find and mark the remaining parts. Hint: You should be able to find everything by just clicking the appropriate Keyword buttons. Tambourine 01 Tambourine 07 Shaker 01 Shaker 06 Shaker 16 Long Crash Cymbal 02
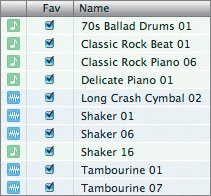 When you are finished, your favorites list should include all the loops shown in the screen shot. Don't forget to click the Reset button and save your work before moving on to the next section. |