| In the Jimbo Tracks sequence you just created, the sound track begins to tell a story. But you also need pictures to complete the job, and the current combination of Jimbo clips is not pleasing. When a clip jumps from one person to the same person in a similar camera framing, in this case a medium close-up, it's called a jump cut. In this exercise, you will cover some of the Jimbo video with other video shots that help tell the story, while keeping the sound track intact. These other shots are referred to as cutaways because you literally cut away to something else. Sometimes cut-away material is referred to as B-Roll footage. To edit video clips or cutaways over existing material, you will need to mark edit points directly in the Timeline to identify just the portion of material you want to replace or overwrite. Marking in the Timeline uses all the same shortcuts as marking in the Viewer, but the mark buttons for the Timeline appear in the Canvas window.  Editing with One Timeline Edit Point For this exercise, you will set In and Out points in the Viewer to determine what portion of the cutaway clip you want to see. You will also mark an In point in the Timeline where you want to place the cutaway. Actually, this will give you the same result as parking the playhead where you want the edit to be placed. 1. | In the Browser, locate the Jimbo Tracks sequence. Ctrl-click it and choose Duplicate from the shortcut menu. Name it Jimbo Tracks Cutaways and double-click to open it.
Tip It's a good idea to duplicate a sequence and work on the duplicate when you are making major editing changes. | | | 2. | Park the playhead on the first frame of the fourth clip, catch a wave, and mark an In point by clicking the Canvas Mark In button or pressing the I key.
 An In point appears in the Canvas scrubber bar and in the Canvas image area. An In point also appears in the ruler area of the Timeline. An In point appears in the Canvas scrubber bar and in the Canvas image area. An In point also appears in the ruler area of the Timeline.
Note When you mark in the Timeline, the marked portion appears lighter than the other clips in the sequence. | | | 3. | To edit just the video of this clip, click the a1 and a2 source controls to disconnect them from the destination tracks. You can also click the destination track controls to get the same result.
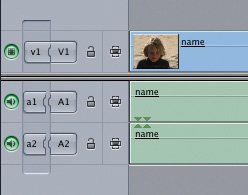 | 4. | In the Surfing Clips bin, display the contents of the Cutaways bin and double-click to open the out to sea clip.
| 5. | In the Viewer, position the playhead one second into the clip and mark an In point. Mark an Out point one second before the end of the clip.
Tip Press Shiftright arrow to move forward one second and Shiftleft arrow to move backward one second. | 6. | Drag the clip from the Viewer to the Canvas Edit Overlay and drop it into the Overwrite section.
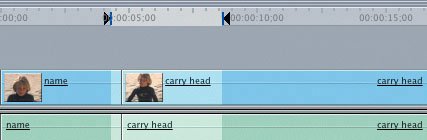
 The new video-only cutaway is placed on V1 at the Timeline In point. It continues for the length it was marked in the Viewer.
Note In order to show the clips more clearly, the playhead in the preceding image has been moved away from the clips. | | | 7. | Play the clip in the sequence.
|
Editing with Two Timeline Edit Points An alternate method is to make two edit points in the Timeline and one in the Viewer. You mark an In and an Out point in the Timeline to identify the clip placement and length. When you do this, you only need to mark an In point on the source clip in the Viewer to identify where you will start using the clip. The source clip will automatically stop at the Out point in the Timeline. 1. | In the Timeline, play from the beginning of the sequence and mark an In point just after Jimbo says "... since I was 5 years old." This time press the I key to mark an In point.
| 2. | Continue playing into the next clip, and mark an Out point after Jimbo says, "... putting it on my head."
 The Timeline In and Out points define the placement and duration of the new clip.
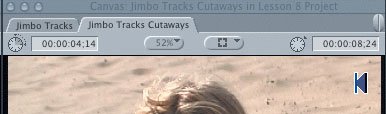 The marked Timeline duration appears in the Canvas Duration field.
| | | 3. | From the Browser, open the board on head clip, and mark an In point at 4:11.
| 4. | Edit this clip into the sequence by dragging it into the Overwrite section of the Canvas Edit Overlay.
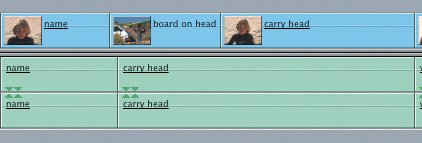 In the Timeline, the first frame of the new source clip is placed at the In point. The Out point in the Timeline determines where the clip stops, or how much of the clip is used.
|
Backtiming a Clip There are occasions when the last frame you want to use of a source clip is more important than the first. In this case, you mark In and Out points in the Timeline to create the edit placement and duration, and mark an Out point in the Viewer on what you want to be the last frame of the clip. Final Cut Express aligns the source clip's Out point to the Out point in the Timeline and uses whatever portion of the clip it needs to fill the distance back to the Timeline In point. This is referred to in editing as backtiming a clip. You are literally backing it into an edit slot. 1. | In the Timeline, park the playhead on the first frame of the nose ride clip, and mark an In point.
| | | 2. | Play the sequence, and mark an Out point on the last frame of the leash clip.
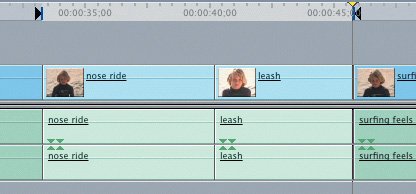 The new video cutaway will cover the video from both of these Jimbo clips, from the In point to the Out point.
Tip By looking at the marked duration in the Canvas Duration field, you can see how much source material you will need to cover this edit. | 3. | From the Browser, open the nose riding clip, and mark just an Out point where Jimbo falls behind the waves, which is at about 14:27 in the clip. Make sure the Viewer duration is as long or longer than the Canvas duration.
 Tip It is very important when backtiming clips to remove any In points in the Viewer. Otherwise the clip will line up In point to In point and not Out to Out. | | | 4. | Edit this clip into the sequence as an Overwrite edit. The Out point of the source clip is aligned with the Out point in the sequence.
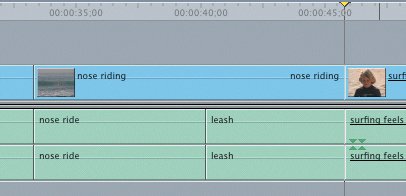 | 5. | Press Cmd-S to save your project and edit decisions.
|
Three-Point Editing Summary To put it all together, three-point edits can be created as follows: In point and Out point marked in the Viewer plus a start point in the Timeline determined by playhead location or a Timeline In point In point and Out point marked in the Viewer plus a stop point in the Timeline determined by a Timeline Out point In point and Out point marked in the Timeline and just an In point marked in the Viewer In point and Out point marked in the Timeline and just an Out point marked in the Viewer
Project Tasks Let's cover the first three seconds of the wax every time sound-bite clip in the Timeline with the cutaway, waxing board med. Using three-point editing, you have some choices. You can mark the first three seconds of the wax every time clip with an In point and Out point in the Timeline. Then mark either an In point or Out point in the Viewer. You can mark just an In point in the wax every time clip in the Timeline. Then in the Viewer, mark an In point and Out point with a three-second duration in the waxing board med clip.
|