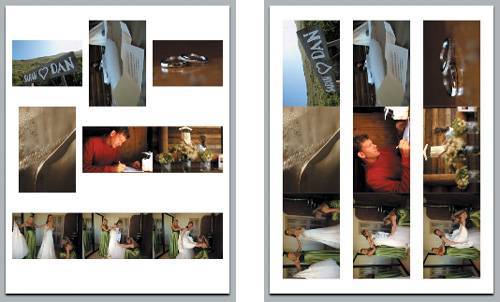
In addition to standard image printing, Aperture has a sophisticated, fast, and flexible contact-sheet-creation tool. In the past, creating and modifying contact sheets has often been time consuming and frustrating. Aperture allows you to create, modify, and save your contact sheet layout quickly and easily.
1. | Press W to reveal the Projects panel.
|
2. | Select the Wedding project.
|
3. | Click in the Browser to make it active, and press Command-A to select all the images.
Note Only the pick of a stack will print. If you need to print other images in the stack, then expand the stack, select the images you wish to print, and press Command-P to enter the Print dialog. |
4. | Choose File > Print Images.
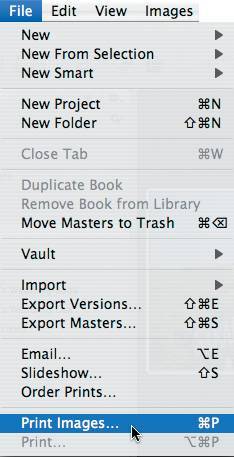 The Print dialog opens.
|
5. | From the Action menu select New Contact Sheet Preset and enter a name for your new contact sheet preset.
 You can choose one of the default presets from the Preset pane or choose to create your own. You can choose one of the default presets from the Preset pane or choose to create your own.
|
6. | Enter the number of copies and pages you wish to print.
|
7. | Select your printer and paper size.
|
8. | Click to select "Number of columns and rows" in Layout Options, then enter 3 in the columns and 3 in the rows entry boxes.
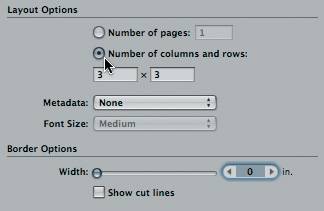 Tip If you want to increase the size of your images, simply decrease the number of columns and rows. |
9. | Choose Portrait from the Orientation menu.
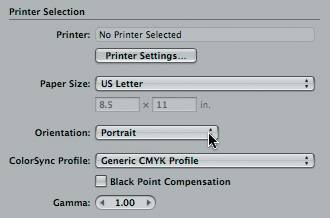  The Best Fit option from the Orientation menu will make optimal use of the specified paper size, automatically rotating images for the best fit on the page regardless of the individual image orientation. Portrait or Landscape will maintain your image orientation even if doing so creates more white space on the page.
|
10. | Choose the ColorSync profile of your output device (printer or press), if you have the profile loaded in your system. (See the last section of this tutorial for more on color management.)
|
11. | Select the Black Point checkbox if you wish to adjust the maximum black level of your image.
|
12. | Adjust the gamma setting if you wish to modify the printed brightness of the image.
|
13. | Choose Name Only from the Metadata pop-up menu to display metadata on your contact sheets.
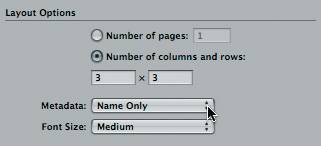 |
14. | If it's not already selected, choose Medium from the Font Size pop-up menu.
|
15. | Select the "Show crop marks" checkbox to print your contact sheet with the image cut lines displayed.
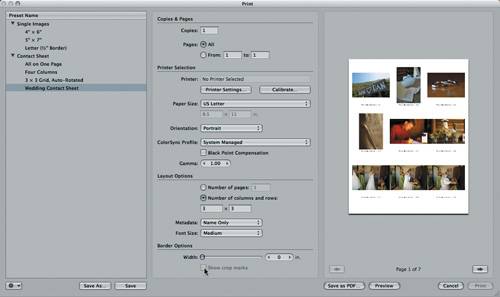 |
16. | Click Save below the Preset pane to save the changes you have applied to your Contact Sheet preset.
|