Other Ways to Improve PC Performance
|
|
You’ve learned about some of the adjustments you can make to try to improve your PC performance. In addition to those already covered in this chapter, let’s look at some other steps that may improve your PC’s performance or, better yet, prevent you from experiencing many performance problems at all.
Make Sure Your PC is Sufficient for the Job
Here’s a plain and simple truth about PC hardware: If you don’t have the resources you need to do your work, your PC’s performance and your productivity will suffer greatly. You’re unlikely to find enough tweaks and worthwhile “booster” programs to make up the slack. A booster program, in this case, is any type of utility that says it will enhance overall performance, such as Internet connection speed, memory utilization, and so on.
These are some questions you should ask yourself when you evaluate whether your system is sufficient for its responsibilities:
Is my processor powerful enough? The answer is probably yes, unless your system is very old or you absolutely must do many tasks at once that may stress a processor earlier than a Pentium II.
How much memory is enough? Never believe the minimum memory requirements listed for Windows and applications you install. Running with a bare minimum amount of memory is a performance-killer in most situations and truly limits what you may be able to do.
While many Windows 95 installations may do fine with just 64MB of RAM installed, you should have 128MB for any situation in which you run professional-type applications such as Microsoft Office. Most consumers rarely need more than 256MB installed unless they’re doing heavy-duty video editing or original, detailed graphics work.
How much hard disk space is enough? If you’ve been using your PC for more than six months, you should already know there is never enough hard drive space. Seriously though, you will need as much as you can imagine, and then some.
However, you must always have at least enough available disk space for the Windows page file, which means about 200MB minimum for 128MB of installed RAM. Once you begin running out of space for the page file, Windows becomes increasingly erratic and runs out of resources to run your programs. Capacious hard disks are so cheap now that it’s hard to justify this happening.
How much PC power supply is enough? The simple answer is a 300-watt power supply for most PCs, and 400-watt units for users who love or need to install a lot of extra hardware to their PCs. But if your PC came with a 200-watt supply and you aren’t adding much else to the system, you’ll probably get by just fine unless and until something kills your current power supply. Then you might want to replace it with a more powerful model. After all, even if you plan to buy a new PC when the time comes for a serious upgrade, you can always harvest the better power supply from your current PC to keep it on the shelf for a day when you need it.
When is it time to think about replacing the entire PC rather than just upgrading parts to improve performance? This really depends on what you currently have, how many components you need to replace to upgrade your current system, and how the prices for replacement parts compare to the price of the new system.
Right now, budget PCs without a monitor start at around $400–$500. For a Pentium IV system of 1.8GHz or better, with a monitor, prices start at $700. If it costs you at least half as much to replace the components in your existing system as it costs you to replace the entire PC, I suggest you buy a new system if you can.
Performance-Related Maintenance
You’ll need to perform the maintenance described in Chapter 3, “Prevention: Limiting Your Risks,” to reduce the chances of a badly fragmented hard disk, a hard disk containing cross-linked files, or a surplus of unwanted temporary files. In addition, backups of documents and other files may seriously hurt your overall system performance. Note that I’m talking about temporary backup files, not the important data backups that I’ve recommended throughout the book.
Performance-related maintenance tasks should include the following:
-
Running Disk Defragmenter
-
Running Disk Cleanup
-
Deinstalling applications you no longer use
-
Running Check Disk (CHKDSK) utility in Windows XP (or ScanDisk in other versions of Windows)
-
Regular virus scans
-
Moving large stores of data you rarely if ever access to a removable medium such as a recordable CD. Make a couple of copies and properly mark these copies before you delete these large hard drive-based data stores.
| Note | Remember the type of work-area maintenance described in Chapter 3. You may find your performance doesn’t suffer quite as much if you respond proactively to keep dust, debris, and moisture away from the area in and around the PC. |
Consolidate and Streamline
Often, your PCs end up being masterpieces in progress. You get a system and then begin to swap out one device for a better one while adding components you didn’t have before, such as an IEEE 1394 adapter (so you can plug in your digital video camera or an external IEEE 1394 drive), a digital camera, or a printer or two.
Sometimes, these additions begin to add up, in terms of power requirements (see Chapter 11, “Avoiding Power and Overheating Problems”) and hardware resources like IRQs and I/O addresses. Such a system may have devices installed that are no longer used because another device has been added that performs the same function. In other words, you augmented your PCs, but you didn’t do it with great forethought or intelligence.
When performance begins to suffer on your system, it’s smart to analyze your PC to see which hardware components you use and which components you don’t need. Then, do a systematic removal of what you no longer need, or at least reconfigure your PC in a way that makes more sense in terms of resources. Consider everything from available drive bays and connectors from the PC power supply to desktop resources and hardware resources.
| Tip | Actually, it’s even wiser to perform such an analysis every six months or so, depending on how frequently you add new hardware to your PC. You don’t have to wait until you experience a problem to prevent a future one. |
Let’s talk about this in more detail, using examples of what you may face with your own PC.
Removing Unused Devices
Take a cool, objective look at your system and see what devices you’ve installed that you no longer use. Then remove them, both physically and by uninstalling their drivers in Device Manager. These unused devices might include
-
The dialup modem you stopped using two years ago when you got broadband service. You kept the modem thinking it was a backup but you never use it.
-
A SCSI host adapter you installed ages ago for an older scanner or other device, but you no longer connect any SCSI devices to it.
-
USB devices (see the next section).
About USB Devices
Let’s talk in detail about universal serial bus (USB) devices because there are a few misconceptions about these devices, along with a lot of barely used USB devices loading up with the PC each time you start it.
Chapter 2, “How your Hardware, Operating System, and Applications Work Together,” when I discussed USB devices, I don’t think I mentioned that you can have up to 127 USB devices connected simultaneously (at least, by specification). This is true, but there are a few caveats:
-
USB devices generally need to get power from somewhere, either through a separate power cord that plugs into an outlet or surge suppressor or through the PC’s power supply.
-
These USB devices will gladly share the same hardware resource (IRQ), but you can tax your system by installing (and keeping installed) too many USB devices at once.
-
Unless you uninstall a USB device, it continues to use most resources except power.
It’s been my experience that users prefer to buy USB devices that don’t require a separate power cord. This is understandable since the area around your PC tends to be a jumble of cords and cables.
However, it’s not realistic to install and run 10 USB devices at once—all without separately supplied power—without draining your power resources through the PC and its power supply. Granted, your PC has a limited number of available USB ports, but as you’ve already learned, you can add a powered USB hub that plugs into one of those available ports and then supplies connections (along with some power) to other USB devices plugged into it. You can plug in these hubs until you run out of USB ports, but do you really need to do that?
To that end, think carefully about what USB devices you want to have connected to your PC all the time. If you have many USB devices, the number of obligatory ones is still probably pretty small. I have more than a dozen USB devices. To limit power consumption and to free up some room in my too-often-cluttered workspace, I unplug unneeded USB devices until I need to use them again. They store beautifully on a shelf below my main work area and are less prone to damage or accidentally dropping because they are out of the way of the desk-area traffic.
However, just unplugging an installed USB device consumes all the resources the device needs, including the loading of its driver. This is very helpful if you have something like a USB scanner or a printer or camera that you might use a few times a week and like to unplug between uses.
For other devices that are apt to be used far less infrequently, I actually uninstall these devices from Windows Device Manager simply because I rarely use them and don’t want their drivers loading each and every time I boot my PC. An example of this on my system is a USB-connected microscope with a fancy Wacom graphics tablet. By uninstalling it, there was a side benefit with my Wacom tablet because its driver can sometimes interfere with my PC’s normal shutdown process.
Not all such devices can be uninstalled. But those devices that use special software installed with the USB device may be listed under Add or Remove Programs in Control Panel. This special software allows you to uninstall the device software just before you unplug and remove the device.
Consolidating Drives
One area in which consolidation can be very helpful is with multiple drives. Many systems today have had at least two different drives added since the PC was first pressed into service. There is nothing wrong with this per se, but if you’re out of drive bays and power supply connectors because you’ve built your system up incrementally, it may make more sense to rethink your approach. Extra physical drives push up internal temperature, demand more power, and take up more room.
Here’s an example. One of my associates was complaining the other day that he had a great new hard drive, but no bays were available and there was no room left to install another IDE/ATA controller into his motherboard. He had no desire to move to a SCSI-based system, where it becomes easier to attach multiple drives to a PC. When I asked what he had installed, he told me that he had a 20GB hard drive, a CD-ROM drive, a CD-RW drive, and a DVD-ROM drive.
Now, this fellow isn’t someone who needs to use both CD-type drives at once, although some people do. Even if he did, his DVD player reads and plays his CDs fine. This means he can remove his CD-ROM drive, freeing up enough room for that new hard drive.
But he can take it one smart step forward: He can remove both his CD-RW drive and DVD player (which he can move to other PCs he has) and install a DVD/CD-RW combo drive, which couples DVD and CD playing/recording. With this, he frees up hardware resources, he frees up a drive bay and a power supply connector, and his PC case becomes less congested.
I don’t want to leave you with the impression that there’s a direct correlation between reducing the number of devices you’ve installed and overall system performance. But it makes sense that reducing overall resource demands may contribute to a system that starts a little faster, has better internal air circulation, and requires a little less power.
Watching Startup Issues
One of the most effective ways you can wear down your PC’s performance and shorten the length of time before you have to restart your system is by having many programs loading at Startup. That’s not something you want to do even if you have a large amount of memory installed.
Loading many programs in Startup may:
-
Seriously reduce available desktop resources for your Windows session.
-
Interfere with the installation of other programs and driver updates as these programs run in the background (and may or may not be obvious to you as you work).
-
Interfere with other desktop processes, including running other applications and games.
-
Lead to system instability (if one or more programs in Startup has a tendency to misbehave).
To view all the programs that load at Windows Startup, including those you may not see in your Systray (the bottom-right corner of your desktop next to the time of day), follow these steps:
-
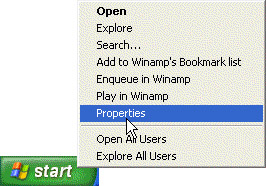
Right-click the Windows Start button and choose Properties.
-
Choose the Start Menu tab.
-
Choose Classic Start menu and then click Customize.

-
Click Advanced, which opens a Start Menu explorer window.
-
Click the Programs folder and then click the Startup folder for a list of programs that load at Startup.

To move an item from your Startup folder (where it automatically loads each time Windows starts) to your Start menu (or to another folder), take these steps:
-
Follow the previous set of steps.
-
At step 5, locate and select the program you want to remove from Startup and drag this program to another folder such as Start Menu.
This book has talked about saving your data and trying to restore your system back to normal operating function. But what do you do about recovering files and applications that may have been lost to you due to some type of disaster? That subject is up next in Chapter 13, “Recovering Lost or Damaged Files and Applications.”
|
|
EAN: 2147483647
Pages: 140
- Chapter I e-Search: A Conceptual Framework of Online Consumer Behavior
- Chapter IX Extrinsic Plus Intrinsic Human Factors Influencing the Web Usage
- Chapter XII Web Design and E-Commerce
- Chapter XV Customer Trust in Online Commerce
- Chapter XVI Turning Web Surfers into Loyal Customers: Cognitive Lock-In Through Interface Design and Web Site Usability