| If you're building Web applications in Dreamweaver using a Windows system and ASP or JSP, you can use a Data Source Name (DSN) to make a connection from your Web application to a local or remote database using an ODBC or JDBC driver. You create a DSN for ASP or JSP in the ODBC Data Source Administrator, as shown in "To define a DSN for an ASP database connection," later in this section. The DSN contains the information for making a connection to a specific database and acts as a shortcut to the connection information. You can also use a DSN with ColdFusion connections, but you create the DSN in the ColdFusion Administrator (see the task "To connect to a data source using ColdFusion," later in this chapter). If you're using an OLE DB driver with ASP or ASP.NET, you must use a connection string rather than a DSN to create a database connection. A connection string is code that identifies a database and provides the information needed to connect to it. For more details, see Dreamweaver Help (F1). If you're building Web applications using PHP on a Macintosh or in Windows, you can't use a DSN. You create a database connection using the MySQL driver that's included with PHP and activated when you install and configure MySQL. See the task "To connect to a database with PHP/MySQL," later in this chapter. To define a DSN for an ASP database connection: 1. | From the Start menu, choose Control Panel > Administrative Tools.
| 2. | Double-click the Data Sources (ODBC) Shortcut icon (Figure 4.26).
The ODBC Data Source Administrator window appears (Figure 4.27).
| 3. | Click the System DSN tab (Figure 4.29) and then click Add.
Figure 4.29. Add a DSN on the System DSN tab of the ODBC Data Source Administrator window. 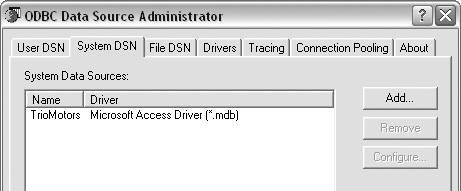
The Create New Data Source dialog appears (Figure 4.30).
Figure 4.30. Choose a driver for the new DSN from the Create New Data Source dialog. 
| 4. | Select the Microsoft Access Driver (*.mdb) and click Finish.
The ODBC Microsoft Access Setup dialog appears.
| 5. | In the Data Source Name field, enter a name for the DSN (Figure 4.31). In the Description field, enter an optional description for the DSN.
Figure 4.31. Configure a DSN in the ODBC Microsoft Access Setup dialog. 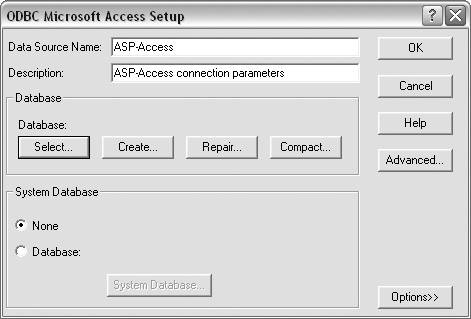
| 6. | In the Database section, click the Select button to choose a database file for the connection.
The Select Database dialog appears.
| 7. | In the Directories list, browse to the location of the Dreamweaver sample Access database (tutorial.mdb): C:\Program Files\Macromedia\Dreamweaver 8\Tutorial_assets\cafe_townsend\data (Figure 4.32).
Figure 4.32. Select a database for the DSN in the Select Database dialog. 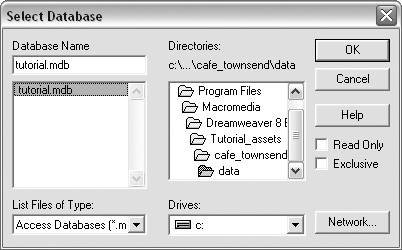
| 8. | The tutorial.mdb file appears in the Database Name field. Select tutorial.mdb and click OK. The ODBC Microsoft Access Setup dialog appears, with the selected database displayed in the Database section (Figure 4.33).
Figure 4.33. The new database choice is confirmed in the ODBC Microsoft Access Setup dialog. 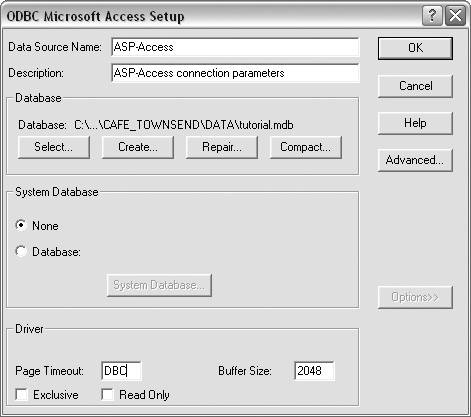
| 9. | Click OK to close the dialog. The new DSN appears in the System DSN list in the ODBC Data Source Administrator window (Figure 4.34). Click OK to close the window.
Figure 4.34. The name of the new DSN is added to the list of system DSNs. 
You'll use this DSN to create an ASP connection in Dreamweaver.
|
 Tips Tips
You must have direct access to a remote computer in order to create a remote DSN. Otherwise, you will need to use a connection string instead of a DSN to create your database connection. Although JSP uses JDBC drivers, you can use an ODBC driver with JSP if you install a JDBC-ODBC bridge driver. See Dreamweaver Help (F1).
|